Showing posts with label Pebeo. Show all posts

Monday, 28 October 2013

If I only had wings...

I don't know, where does the time go?  Almost the end of October already, and here I am only just making the deadline for SanDee and amelie's Steampunk blog challenge.
This time it's aTic-Tac-Toe grid.
 and I've gone with Metal, Wings, and Braid or Ribbon to create a necklace for Lady Ermintrude.
I enjoy kumihimo braiding, and made the cord myself -for those who are interested,  it's an 8-strand cord made with 1mm rattail thread (it's not that easy to find 1mm rattail!)  The square pendant is a Media Mixage bezel, the background is done with Pebeo Vitrail and Fantasy paints like this;  once they were dry, the gear was added and then the whole thing covered in Gedeo crystal resin (I like this resin as it doesn't smell, but it does take a good 24 hours to set properly)  The angel wing charm I found on a well-known auction site .  Altogether, I think Lady E will enjoy wearing this piece when she goes for a jaunt in Major Thomas's Dirigible, don't you?

Thanks for visiting,

Crafty Hugs,

Keren

Friday, 17 May 2013

Faux enamelled pendant

I bought some Pebeo Fantasy paints from Create and Craft, with no idea how to use them - if they were demo'd it happened when I was in work and I missed it.  I no way daunted, I did a bit of research on the internet and came across this technique - here's my version!

Begin with the blank pendant - mine came from that well-known auction site.  I've foiled the back of these (just to see what the effect would be)

Add some solvent based glass paint - I used a pipette (this is Rainbow Glass because it's what I have handy, Pebeo Vitrail is very good also).  I started with some clear to dilute the colours a bit as they are very concentrated.  This time I've used green and blue.

The effect so far - you can see how the foil catches the light and reflects it through the transparent paint.
Then I added a few drops of Pebeo Fantasy Prisme in Mandarin -
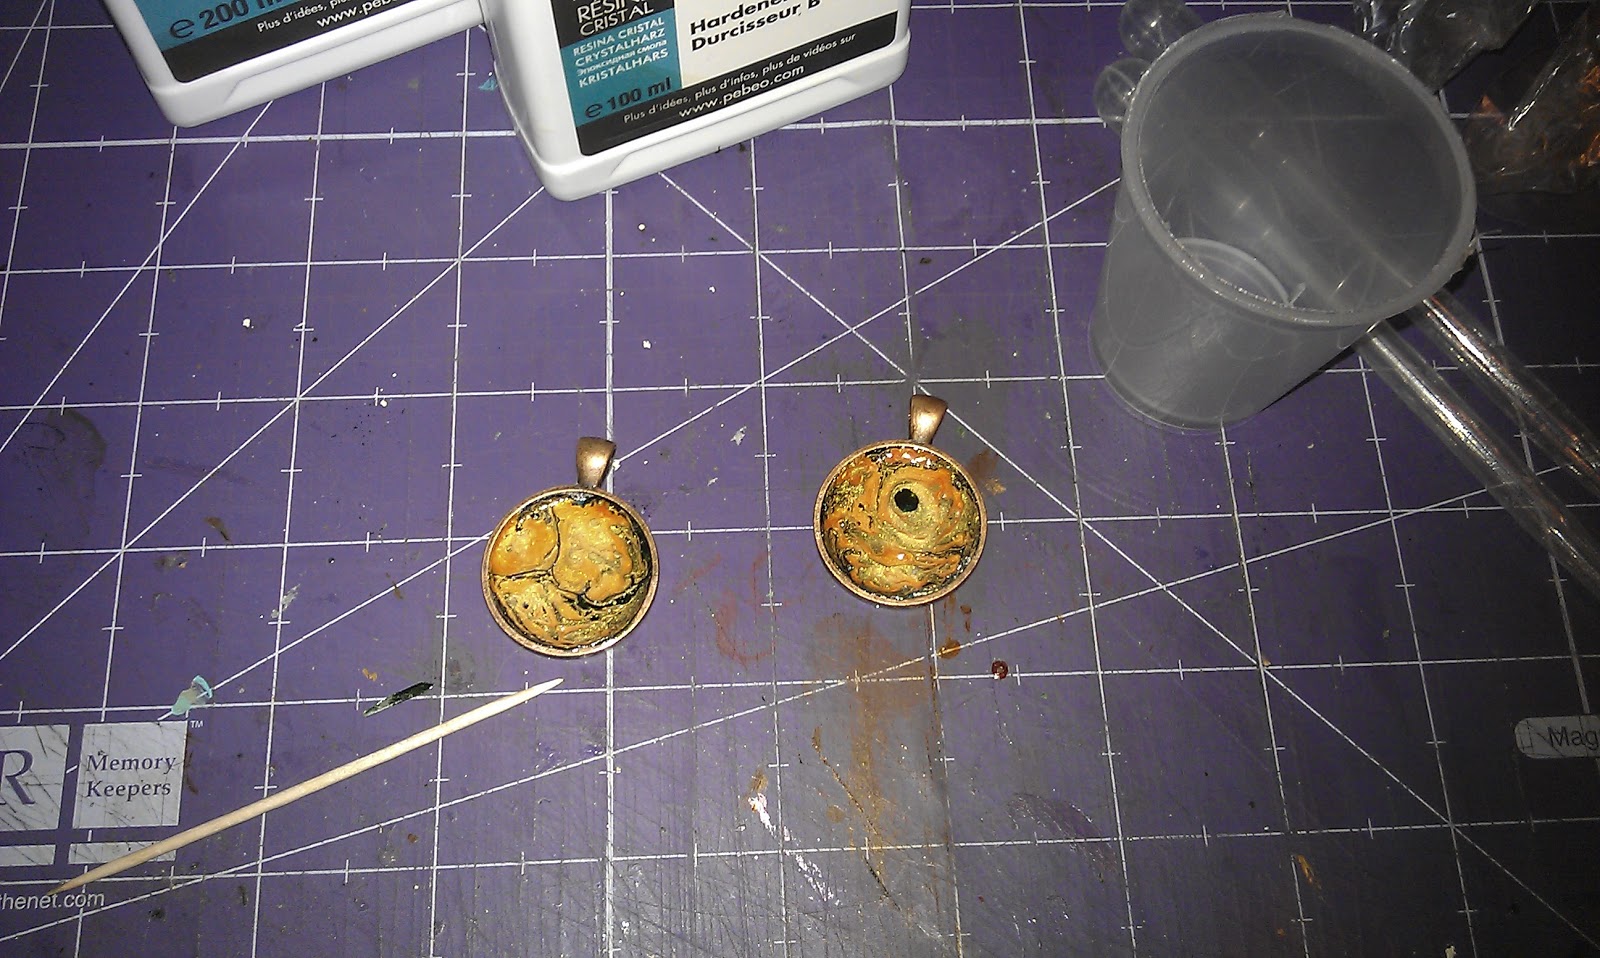
I moved the colours a tiny bit with a cocktail stick and then left the blanks to set.  I made sure that I left them with the bails hanging over the edge of the table so that the backs were flat to the table and level.
After a day's setting time, this is what I had - as you can see, the Fantasy paint has spread out a lot.  I could probably have used much less of the fantasy paint!  As it dries the glass paint flattens out.  To protect it and add a crystal effect, I mixed up some Gedeo crystal resin.  I like this one as it doesn't smell!  It takes a day to set so again, I put the pendants aside, making sure they were level by putting them at the edge of the table with the bails hanging over the edge (and putting them out of the cat's way as I didn't want bits of Persian cat fur in them!


The finished item!   I've suspended one of the pendants from some black velvet tubing and made it into a necklace and I think it looks pretty good, even though I do say so myself.

Sunday, 14 April 2013

Papillon

Hello everyone and welcome to my little bit of the Blogiverse.  I'm really happy that you've chosen to visit me.  Without further ado, here's today's offering-
I bought some Kroma Crackle medium a while ago and have been trying to get around to using it for some time...and finally did.  I painted this MDF heart (which came in the kit - from Create and Craft - with the Kroma) in pale green, added a splash of pink paint to the Kroma, and dolloped (technical term) the stuff all over the heart, and waited for it to crackle...and waited...and got fed up and took the heat tool to it.

I found out (later) that the Kroma can take up to three days to crackle if left to itself.  If you accelerate the process you get some mighty big cracks (ravines is probably a better word).  And it continues to crackle, so that by the time it was finished, you could hardly see any pink bits at all.  In fact, you'll probably need to click on the picture to get a larger view of it before you can spot it.  Trust me, it is there!


Well, now I have a large sullen lump of mainly green and slightly pink-ish MDF and I'm asking myself what came over me as I don't much like green or pink, so what am I going to do with it?  When in doubt, add Distress!  I blended Peeled Paint DI over the edges and Worn Lipstick and Picked Raspberry over the surface to try and pink up the Kroma a bit, then I sealed it all and thought about what I was going to do next. 

In search of inspiration, I went rummaging through my leftover bits box (all right, it's not just one box.  I'm not saying how many there are.) and found a piece of Tim Holtz Tissue wrap, some paper I'd coloured with mica sprays in shades of blue and lilac, and an Eiffel Tower that I'd cut out with my Cameo for another project and never used.  I don't know why, but the ol' Tour d'Eiffel seemed to work well on the project.  The blue paper reminded me of butterfly wings.


The tissue wrap and the Eiffel Tower went onto the heart with the aid of some Bindex medium (from Pebeo).  I die-cut the lower part of the butterfly (it's an old Quick-Kutz double-cut die and is one of my all-time favourites)  from the paper and the upper part from black card.  I stamped the "Bright Elusive Butterfly" stamp (my own design, made with my Imagepac) onto ordinary tissue paper, tore it out, and stuck it onto the background with the Bindex.  Fast forward through the drying time (actually not too long), during which I layered up some Prima flowers which have been in my stash for a LONG time and stuck the two layers of the butterfly together.

Finally, it was time to stick the flowers and the butterfly onto the base and pretend that it was All Planned From the Beginning. 

I'm entering it into the following challenges -

Country View Crafts - Butterflies
Sunday Stampers - Paint

Thank you for visiting;  I hope you enjoyed!

Crafty Hugs,

Keren