Monday, 3 June 2013

Gallows humour

If you like creepy, spooky or Gothic the Haunted Design House is for you.  They don't do pink and fluffy over there, as you can guess by the fact that their latest challenge is  - to use knots or a noose.

It's probably the result of being married to an unrepentant punster (who is much better, thank you to those of you who enquired after him) that I came up with this one. 

The image is clipart downloaded from the web - I hope nobody goes looking at my search history...it includes terms such as hanging, gallows, and gibbet. ("Honestly, officer, I was doing research for a crafting project...")  I added in the words, adjusted the colour to sepia and printed it out on supersmooth card, which I diecut into the tag shape. I gave it  a few layers of DI (Scattered Straw, Weathered Wood, Peeled Paint an Frayed Burlap) till I was happy with it.

The last job was to make the hangman's noose (I've always wondered how to tie a hangman's knot and now I know how!) and adhere to the tag.

A bit grisly - but I hope you like it anyhow.

Thanks for visiting,

Crafty hugs,

Keren

Sunday, 2 June 2013

Tim's 12 Tags - June

Well, it's halfway through the year (where is it going?) and time for Tim Holtz's latest tag & technique  Much to my amazement, I haven't fallen off yet!  I really liked this one - although there was a slight strop with self when I couldn't find where I'd stored the watercolour paper.  (Panic was averted when it turned up in a box where I was sure it would never be.)

As luck would have it, my friendly postman had just delivered a beautiful stamp (from Inkylicious) which I wanted to use, so this was a great opportunity.  For colours I used Victorian Velvet, Spun Sugar, Bundled Sage, Dried Marigold, Aged Mahogany and Stormy Sky - when I'd finished it reminded me of the pre- First World War advertisement which suited the stamp.

I was a bit worried about using the three products (ink, stain and acrylic) on the background tag, but I had faith in Tim and, what d'ya know, it worked well.  Background stamps were from my stash.  So - on to July!

Crafty hugs,

Keren

Friday, 31 May 2013

F is for...


Hi blog friends!
 
The latest Craft Barn Alpha challenge is letter F, with the added condition that the word chosen must begin with the letters FE to FR.  I've gone with "Feather" 
 
One of the things I love about ATCs is the speed.  I've mentioned elsewhere that crafting has had to take a back seat of late (but soon, my lovelies, I shall be back up to full strength - mwah-hah-hah!)  I coloured the reverse side of a piece of Centura Pearl card with DI's in Mowed Lawn, Peacock Feathers and Black Soot.  Once it was dry I stamped the small feather (a Sam Poole stamp) in Versamark and brushed on some mica powders in gold, turquoise and green.

I stamped the large feather in FlitterGlu and gilded it and job was done.

Thank you for visiting - hope you enjoyed yourself!

Crafty Hugs,

Keren

Wednesday, 29 May 2013

WOYWW - Happy 4th Anniversary!


Blogging and running today, folks, but I had to be part of the WOYWW 4th Anniversary bash!  Terribly boring workspace today, featuring an ATC just cut and with the corners rounded by the Corner Chomper, a basket of stuff, and some rubber stamps to be used on said ATC.  I bet your desk is much more interesting, so I'm off to have a look.
 
Happy WOYWW everyone!
 
Crafty Hugs,
 
Keren


Tuesday, 28 May 2013

Poe-try

Hello, blog friends and thank you for visiting.

I've been a bit quiet lately.  There have been a couple of reasons, one being that my husband has been in the hospital (he had a nasty infection in a gland in his neck and spent five days on intravenous antibiotics).  Running to and fro to visit him, plus the demands of getting  to grips with a new job and recovering from the old one (seriously stressful!) left me little time or inclination to craft. Then I got a bit carried away with my entry for the Quoth the Raven challenge...it turned into a real project.  So this post is going to have quite a few photos.

The theme is "Anything Poes" - and I've taken my inspiration from "The Raven". 

It was originally going to be a notebook cover.  I began by embossing black cardstock and painting it to get the look of leather - one of Andy Skinner's Timeworn Techniques.  The frame was made using a mould bought from a well-known internet auction site and is moulded out of paper clay, painted silver (Eco Green Antique Silver, as it happens.) The plaque I made out of Pearl white Fimo. When it was cooked I stamped the raven stamp (from the Tim Holtz Hallowe'en set) in black archival ink and covered it in Glossy Accents.  I made the book cover out of chipboard (yes, the pieces that come to act as dividers in the boxes of envelopes we have in the office.)  And I could have stopped there...but I didn't.

I decided to put the poem into a mini album using Laura Denison's "Stack the Deck" method.  The great thing about this method is that it allows space for embellishments.  I love getting a 3D element into my projects and my latest toys are some Martha Stewart silicon moulds, including this frame, so while I had the paper clay out it would have been rude not to make it.  I made my own mould (with Siligum) of a rose-shaped bead and made a few paper clay roses while I was at it. 
I made the leaves for the Stack the Deck out of black cardstock, and while the paper clay was drying I went searching for some suitable papers to suit my project.  In the haunted wing of my stash I found a pad of "oriental" papers I've had for years - so long I can't remember where or when I bought them - but the rich colours were just the job.  In the pad there was some white textured paper with a gold flower design that I didn't like very much.  When the flowers were dry I put some sheets of the white paper underneath them while I sprayed them (black & red Mr Huey's and pewter and red Radiant Rains)...and they suddenly became yummy - result!  All that was needed then was a vintage picture (again, one I've had for years) to represent Leonore and to paint the frame silver.

Surpise - the page opens up. I die-cut some ravens and the candlestick using the Alterations dies and you can see some of the oriental paper behind the raven.  The silver part of the candlestick is cut from a scrap of textured card that I found at the same time as the oriental paper.
Next pages - the window is a digital stamp from Ike's, printed out twice, colored with Spectrum Noirs.  I cut the panels out of the lower print and stuck the frame onto acetate. I backed the acetate with a scrap of card - I masked the moon and blended shades of blue ink (Adirondack Cloudy Blue, Stonewashed and Denim) over the mask with a bit of Dusty Concord and Black Soot Distress Inks around the edge.  I used the Split Tree stamp from Clarity to get the branches (I used Memento ink).  I repeated the process on the tag and added the Raven  (Dah-dah-DAH!)
The raven and the background paper on the left are from Ike's. (I like Ike's.  They have some very fab digital stamps in the fantasy/gothic genre)  On the right, the raven is from Smeared Ink - added to the bust of Pallas and coloured with my Speccies (hard to see in the image but it is really a light grey).
More diecuts and Smeared Ink digi stamping
Etcetera

Etcetera
Nearly done.  You can find directions for the pushmi-pullyu card here.
The last page.  Thank you for staying with me in this marathon post!

Crafty hugs,

Keren

Saturday, 18 May 2013

K is for...

Hi blog friends - good to see you!  If you've been keeping up with the Craft Barn Alpha challenge, you will know that we're up to K.  Not the easiest letter, even if it is the initial of my first name. After toying with "King" or "Kite" or "Kitten", I finally decided on - "Knight".
The knight chess piece is from an "Alice in Wonderland"  set I've had for years.  I masked it out and stamped the tiled floor (from Lost Coast Stamps) over the top, blended Weathered Wood and Pumice Stone DI's over the back and added the shadow around the knight with grey Promarkers.

And that's it.  Short & sweet tonight, folks - the OH is in hospital (don't worry, it's pretty minor stuff) so I'm off to visit the sick!

See you soon!

Crafty Hugs,

Keren

Friday, 17 May 2013

Faux enamelled pendant

I bought some Pebeo Fantasy paints from Create and Craft, with no idea how to use them - if they were demo'd it happened when I was in work and I missed it.  I no way daunted, I did a bit of research on the internet and came across this technique - here's my version!

Begin with the blank pendant - mine came from that well-known auction site.  I've foiled the back of these (just to see what the effect would be)

Add some solvent based glass paint - I used a pipette (this is Rainbow Glass because it's what I have handy, Pebeo Vitrail is very good also).  I started with some clear to dilute the colours a bit as they are very concentrated.  This time I've used green and blue.

The effect so far - you can see how the foil catches the light and reflects it through the transparent paint.
Then I added a few drops of Pebeo Fantasy Prisme in Mandarin -
I moved the colours a tiny bit with a cocktail stick and then left the blanks to set.  I made sure that I left them with the bails hanging over the edge of the table so that the backs were flat to the table and level.
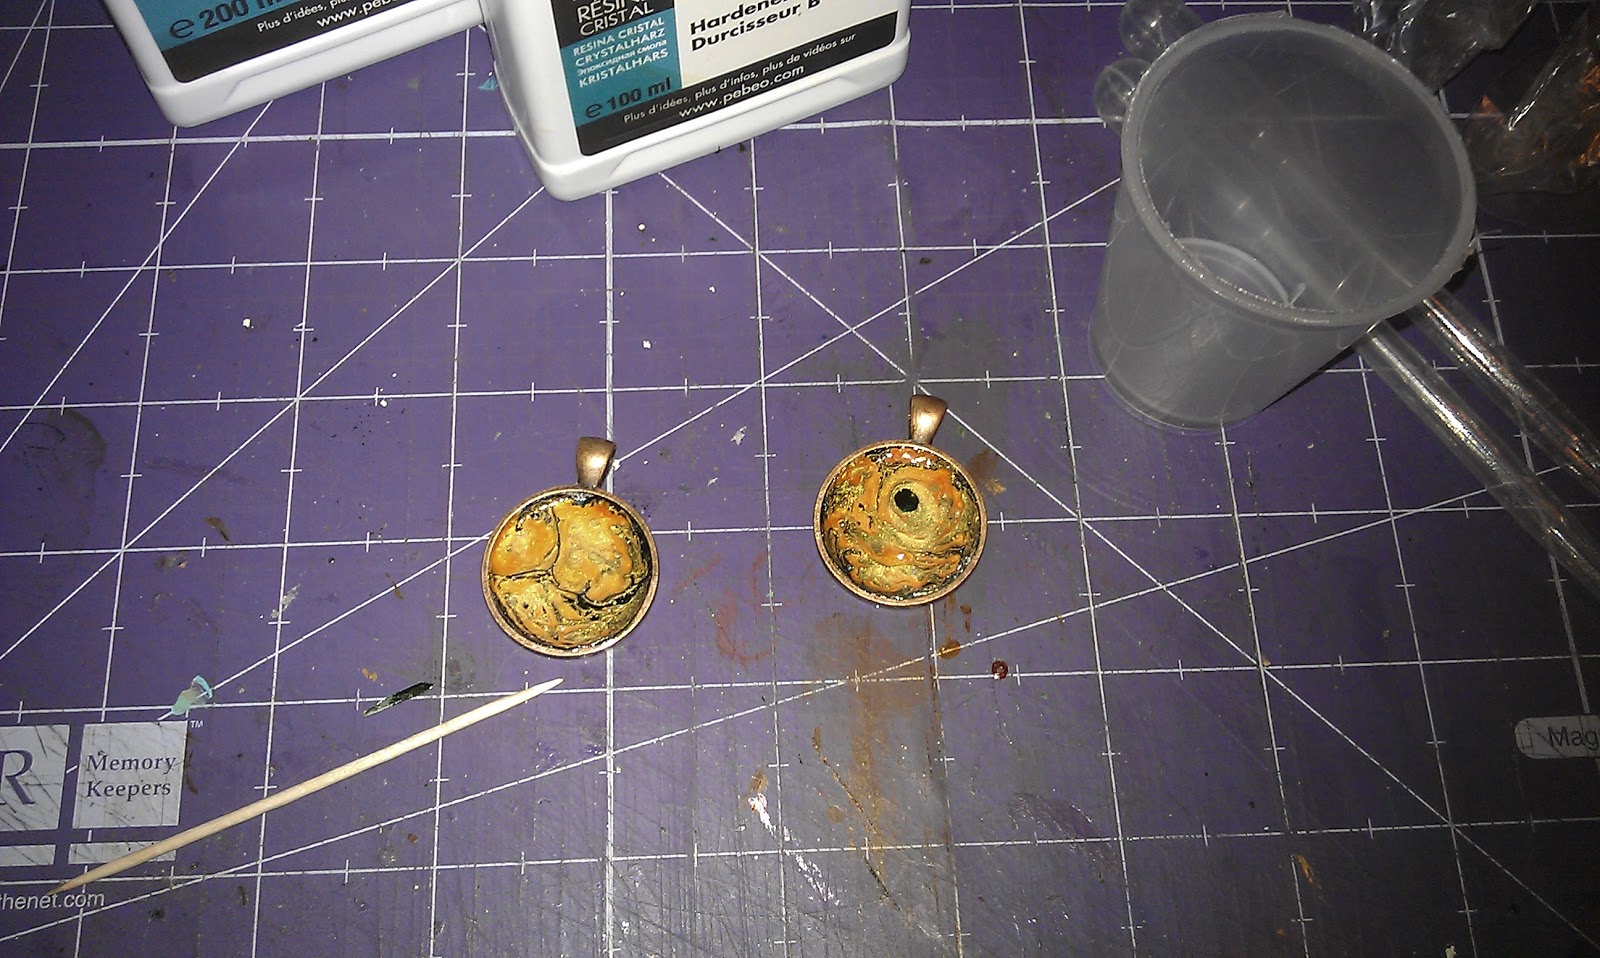
After a day's setting time, this is what I had - as you can see, the Fantasy paint has spread out a lot.  I could probably have used much less of the fantasy paint!  As it dries the glass paint flattens out.  To protect it and add a crystal effect, I mixed up some Gedeo crystal resin.  I like this one as it doesn't smell!  It takes a day to set so again, I put the pendants aside, making sure they were level by putting them at the edge of the table with the bails hanging over the edge (and putting them out of the cat's way as I didn't want bits of Persian cat fur in them!


The finished item!   I've suspended one of the pendants from some black velvet tubing and made it into a necklace and I think it looks pretty good, even though I do say so myself.