Monday, 1 April 2013

A Cameo Appearance!

I knew as soon as I saw the Tim Holtz Alterations Cameo Frame that it was going to be one of my favourites.  There's just something about the shape that says "days of Yore".  And the movers and shapers ovals work so well within the shape...I just LOVE it! 

So, I've been playing.  I started by embossing some Kraft card (some packaging material, as a matter of fact) with an embossing folder, then once I'd die cut the frame I gave it an undercoat of off-white acrylic paint.  (I was aiming for a ceramic effect, but it didn't work out that way!) I love this embossing folder - it's got a real William Morris feel about it, and I do so like William Morris...
Add caption
Once it was dry, I gave it a few layers of very well-watered paint to antique it, dry brushed  the highlights, and repeated until I was happy with the effect.   (In real life, it's a warmer colour than it looks in the photo.) The Kraft card I'd started with gave it a texture that was a bit like wood, so  I abandoned the idea of making it look like ceramic and gave it a couple of coats of Klear floor wax (now called Pledge Multi-Surface wax).  It doesn't really show in the photo, but the Klear gives it a lovely satin finish.  I die- cut a piece of chipboard for the backing, and glued a strut from the same material to the back of it.  Once I added the photo and glued it all together, the job was done!   
 
So -as I was inspired by William Morris to put this together, I will enter it into the "Inspired By" challenge at the  Anything But A Card Blog challenge.

(The photo is of  me, aged three.  I'm wearing a dress my sister made for me, and strangely enough, I remember it- it was turquoise blue cotton, and she did the smocking on it herself.   Isn't it funny how some things stay with you? )
Anyway, I will be making more of these little frames and will show them to you as they're done. I do hope you enjoyed your visit here - thank you for stopping by, and please do call again!

Sunday, 24 March 2013

When I am an old woman...

When I am an old woman I shall wear purple
With a red hat which doesn't go, and doesn't suit me.
And I shall spend my pension on brandy and summer gloves
And satin sandals, and say we've no money for butter.

(Warning, by Jenny Joseph)

Have you heard of the Red Hat Society?  It's a social organisation of, er, mature ladies which began when one of the founders gave a friend a red hat and a copy of the poem.  Here's my little red hat, which has taken me a very long time to make - well, not so much the hat as the display stand, if truth be told!
 

The hat is adapted from a pattern by Kim Costello (see here) that was published in Craft Stamper magazine some time ago.  I coloured the feathers with alcohol pens.  The stand is a CD with a cut-down packaging tube stuck to it.  The base I covered in Artists' Spackle texture paste, sprayed green and sprinkled with Flower Soft.  The upright I covered with paper left over after Tim Holtz's Tattered Florals Challenge (blending a little Vintage Photo DI over it first) and added a couple of flowers that I'd made for the Tattered Florals challenge but never used.

And there it is - my entry for the "Anything Goes- Pick and Mix" Country View Crafts blog challenge.  Thank you for taking the time to check it out.  I hope you liked it!

P is for..

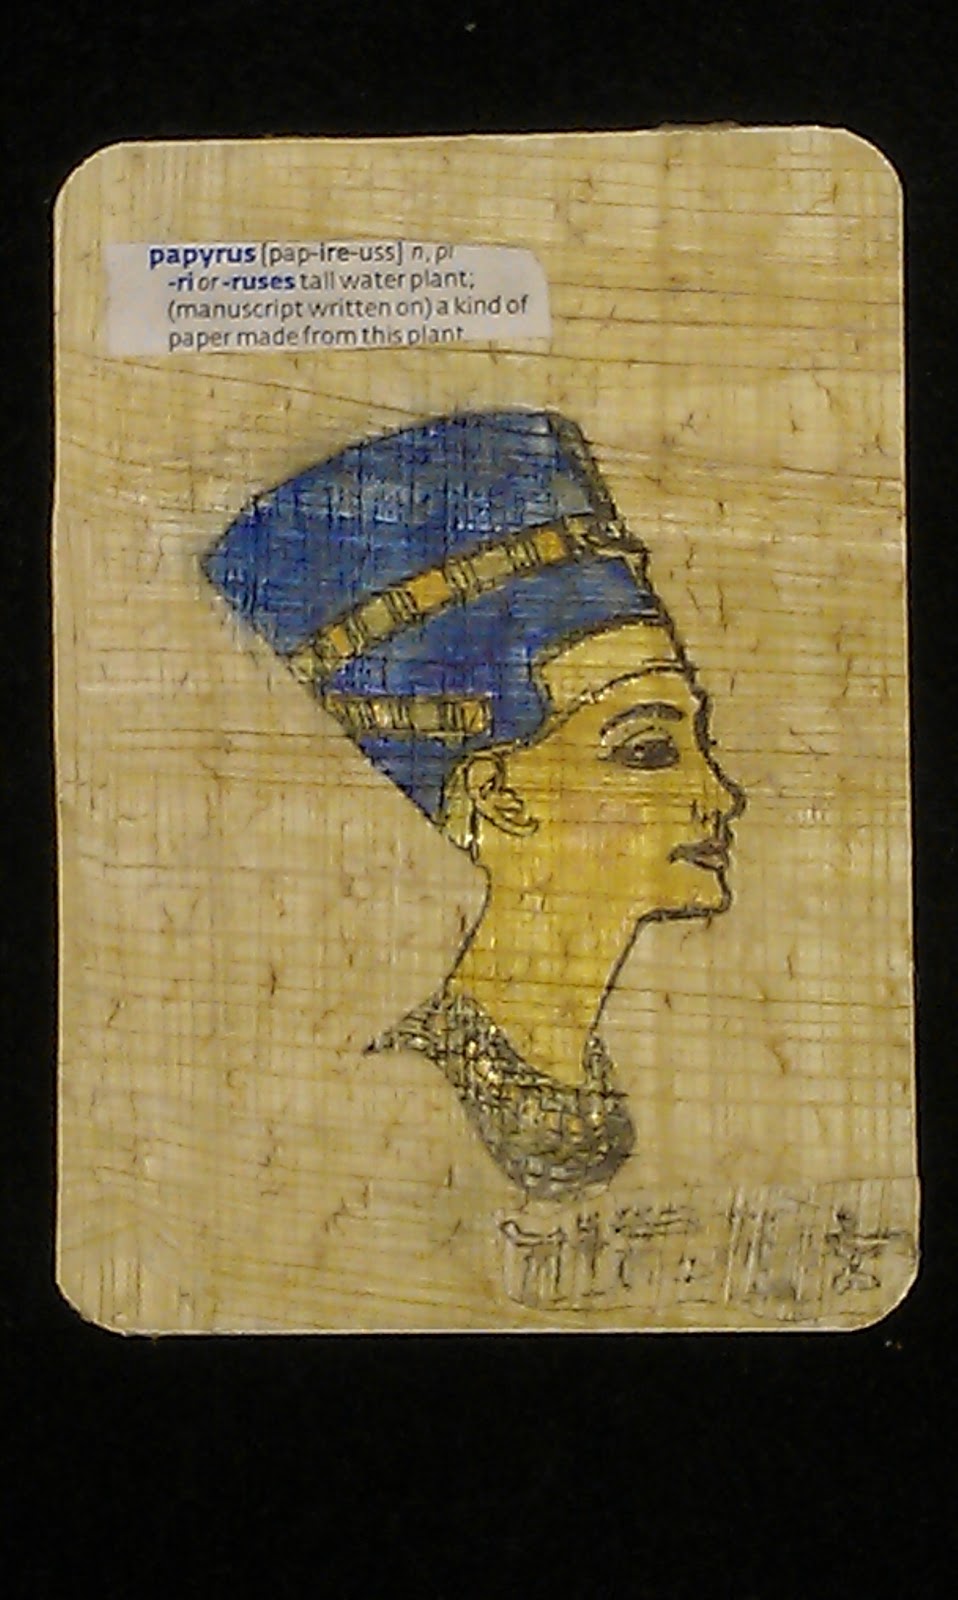
We have an Egypt Centre here in Swansea.  My sister-in-law has a part-time job there - she's always been fascinated by Ancient Egypt and her degree in in Egyptian Studies.  So for this fortnight's Craft Barn Alphabet challenge, inspired by the ancient Egyptians, I've chosen "Papyrus".

The stamp is from Clarity, and yes, that is real papyrus it's been stamped on - in Tuxedo Black Memento, as it happens.  I've coloured it with Promarkers, so if you were desperate to know whether or not they worked on papyrus, well, now you do!  According to my SIL, the Egyptians loved bright colours (to quote her, "They'd have used glitter if they had it!") so I've chosen nice bold colours.  I hope you like it! 

Wednesday, 20 March 2013

WOYWW - 20 March

Happy WOYWW everyone!  (What's WOYWW?  Find out here!)  Well, after last week's aberration, where you actually caught me cooking (GASP!), normal-ish service has been resumed.  (By the way, the Red Nose cake pops sold like - well, hot cakes, so it was worth the effort - even if the kitchen did look like the shower at the Bates Motel after I'd finished decorating them).

On my workdesk today, you can see that I am finally finishing off a project I began around August.  The little red hat is adapted from a design by Kim Costello (see here for details).  If you know about the Red Hat Society, you will not be surprised that I've added a purple glitter ribbon and purple feathers (coloured with my Spectrum Noirs).  If you've never heard of the Red Hat ladies, you can find out more here.  I'm making a nice little display stand out of a CD and a cardboard packaging tube.  The pots you can see there contain "surplus" bits that will probably feature on the finished item.  I haven't decided yet!

So now I'm off to see what everyone else is up to.  Thank you very much for your visit;  I really do appreciate everyone who drops by.  Hope you enjoyed yourself - come back any time, you're very welcome!

Saturday, 16 March 2013

I give in...

I wasn't going to enter Tim Holtz's Tattered Floral Challenge.  I was perfectly happy looking at the brilliant projects everyone else was making, but didn't feel the urge to join in.  Until just now, that is!  I woke up thinking, "I wonder if I could use the Tattered Florals Die to make roses?"   You can guess the rest!   I gave in to the impulse, and much to my surprise, put together a project for the challenge.  Here's what I did...

I cut out a wodge (technical term) of flowers out of some script paper I'd been hoarding for ages (one of the great things about the steel rule dies and the Vagabond is that you can cut multiple sheets of paper in one go, which is what I did!) and made up the roses by my favourite method.  I had to adapt it a bit because it works best with odd numbers of petals and I did need to cut into the centres of the flowers to get the petals to curl around.  I started out thinking that I'd add some subtle colour to the petals. (I changed my mind in the end and sprayed them with inks in shades of red, yellow and orange , though so it was all a bit of a waste of time.)

A bit of DI to tint the petals - complete waste of time as I changed my mind and sprayed them afterwards!
. 


Outer petals on the left, inner bud on the right!  See here for full details of how-to make paper roses
After giving the flowers a spritz of Vintage Photo with some gold Perfect Pearls mixed in it,  I got on with the frame - I am LOVING the Cameo Frame, especially with the oval Movers & Shapers dies.  I cut it three times out of chipboard (and once out of script paper), first with the medium sized oval aperture and then  with the largest size, and finally with no aperture.  I glued the script paper to the corresponding piece of chipboard and blended Vintage Photo DI around the edge.   I coloured the other frame piece with Crushed Olive Distress Stain and touched Burnished Brass stain around the aperture and the outside edge of the frame.  Then I gave it a good layer of Rock Candy crackle paint.


Once it was all dry, it was time to assemble it.  I added in some small Tattered Leaves which I'd coloured with DI in Peeled Paint and Iced Spruce, and a photo.  Yes, that's me in my mother's arms. ( I was 4 months old at the time.)

Anyway, that's it!  Thank you for visiting, and I hope you enjoyed.  See you soon!

Wednesday, 13 March 2013

WOYWW - 13 March

Today I have moved to the kitchen for WOYWW.  This doesn't happen often, but it's not unknown!  It's Red Nose Day on Friday and we are going to come to work wearing pyjamas and raise money for Comic Relief.  I have promised to make Red Nose cake pops so here you see the cakes in the nude, as it were' defrosting before being coated in red Candy Melts.  (I'm considering selling them with the slogan, "Pick your nose and eat it". Sorry about that!)
 Anyway, thank you for visiting and I am off to have a nosey at what everyone else is up to.  See you round the blogiverse!

Monday, 11 March 2013

A Steampunk Cuckoo Clock


Some time ago, that plucky gel, Lady Ermintrude Duffryn-Felix, accompanied by Major Thomas Felix, visited a Steampunk gathering.   There were a great number of spiffing diversions with which visitors could amuse themselves;  Lady E was particularly intrigued by an exhibit in the Contraption Competition, an automaton in the shape of a dog, called K-1909.  The machine was enamelled in shiny black, ornamented with curlicues in gold paint, and Lady E thought that was a most striking combination.
 
Accordingly, then, when challenged by SanDee and Amelie to design a Steampunk Cuckoo Clock, Lady Ermintrude recalled the mechanical canine and took inspiration from it, and here is the result.

I began with by cutting a piece of greyboard (one of the dividers from a box of envelopes) using the Tim Holtz Cameo frame die.  I cut off the lower curve of the frame, and used the remaining greyboard to cut the base of the clock.  I coloured the board with black Gilder's Paste. I fussy-cut the clock face from 6x6 Chronology Paper (by Docrafts). Almost everything else is die-cut and GIlder's Paste (cogs  and clock hands by Docrafts, corners by Marianne, bird by Tim Holtz) except for the wings (stamp by Kanban embossed in WOW powder) and the fancy corners on the base (Clarity stamps).  The bird needed a bit of something extra, so I glued on some tiny watch parts. 

And there we are.  I hope you like it.  Thank you for stopping by - come again, you're always welcome!