Thursday 31 May 2012

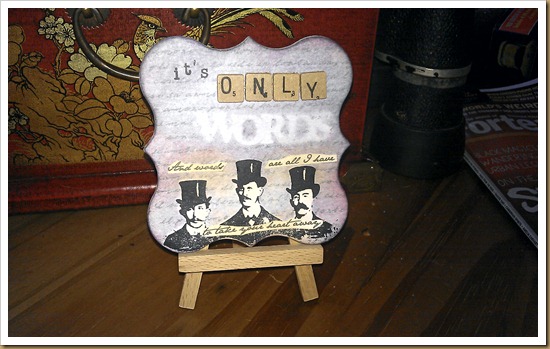
Words

Hels Sheridan’s Sunday Stampers challenge this week was inspired by the sad news of Robin Gibb’s passing.  The Bee Gees were part of the soundtrack to my youth.   My first proper, being asked to dance by a real boy, dance was to “Massachusetts”.  I bought “Gotta Get a Message to You” and played it until I almost wore it out.  “Words” is one of my favourite Bee Gees songs; no, let’s change that – it’s one of my favourite songs, full stop. 

IMAG0216-1

So I had to make something for this week’s challenge.  I began with a Stamps Away white chipboard label shape, and stamped and masked the three men in the foreground.  (The three top-hatted men could be the predecessors of the Bee Gees – sort of the Pre Gees.) (Sorry!)  I cut the “WORDS” stencil using my Cameo, and went over the whole thing with Distress Ink on Ink Dusters.  The script in the background was stamped in London Fog Memento.  Some word tiles from my stash, print out a phrase and the result is as you see it.

Tuesday 29 May 2012

WOYWW–30 May

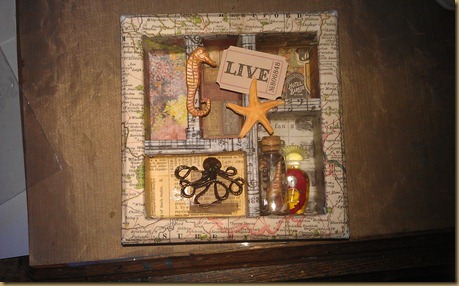
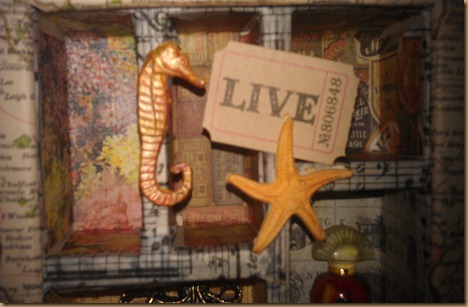
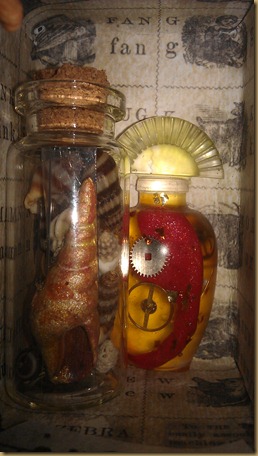
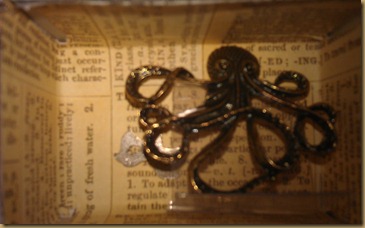
Wednesday night is dance class night so as usual, I have to blog and run.  This week I’m working on a Configurations box.  It’s something I’ve been putting together for a while and it’ll be a while longer before it’s finished, but I’m n no hurry.

IMAG0208

IMAG0212IMAG0209IMAG0210

Hop across to Julia’s blog to find out how to join in the fun.  I’m off to learn how to do the Quickstep –thanks for visiting!

Monday 28 May 2012

Compendium of Curiosities II–Challenge 7

IMAG0199-1

Here’s my latest contribution to Linda’s challenge.  This week the focus is on the Brushless Watercolour technique from Tim Holtz’s Compendium of Curiosities II. I challenged myself further by using greens – Crushed Olive and Peeled Paint – which aren’t my favourite colours (I’m an Aries and I love RED! – or leopard print).  I have to be honest, when I started to try this technique I thought it wasn’t going to end well, but it came out pretty good,  I thought.  As well as Tim's technique I took my water brush and highlighted parts of the design by wetting them and then blotting up the water.  Once it was all dry I overprinted the music and the sentiment using Memento ink. 

If you want to join in, over to Studio L3  for all the details.  This week’s challenge is sponsored by the lovely people at Eclectic Paperie so you could win some goodies!

Sunday 27 May 2012

WOYWW - 23 May

The Faux-lympic torch!


The Olympic flame is going to be carried down the road in front of where I live.  Now, I'm not a big fan of the Olympics (or any sport really) but I can't help getting a little excited about the flame relay.  It's a once-in-a-lifetime kind of thing and I'm hoping to get some photos to scrapbook, but meanwhile-

This is what's on my workdesk this week, put together with the aid of my beloved Cameo.  I'm thinking of taking it into work and having a relay around the office...could be cool?

Off to blog-hop around the WOYWW blogs, starting with Julia's at the Stamping Ground - why don't you join in?

Update -


The real thing, carried through Swansea on 26 May.

Thursday 24 May 2012

Round in Circles

This is my attempt for Hels Sheridan's challenge this week.  It's based on a Stamps Away whiteboard watch shape which I've covered in my beloved Croco paint.  The background stamp is from Hero Arts and the dress form is from Steampunk Dreams by Creative Impressions.  The sentiment is from Ink and the Dog.  Distress ink features heavily (for a change!)  and the flowers are from Prima. 

Saturday 19 May 2012

Tag art again

The Love of My Life is up and about, the flu (and plague) having backed off a bit. He had nasty pains in his joints which have subsided, but is now sneezing. Apparently he had a virus in the fluid around his joints at the same time as he was coming down with a cold. The virus masked the cold symptoms then, as it got better, the cold took over. It could only happen to him....

Anyway, back to crafting.


The three top-hatted men is just about my favourite stamp at the moment.  And of course, I am a steampunk fan.  So there you have it.

Here comes the sun..?

Is it too much to ask for some fine weather?  We haven't had much this year so far, so I've made this tag to try a whip up some sympathetic magic (tee hee!)

Thursday 17 May 2012

Compendium of Curiosities II - Challenge 5

I'm often surprised by how my crafting turns out - it's so often not where I expected it to be.  This was meant to much less vibrant but it just growed like this.  So this is my comtribution to week 5 of Linda's challenge based around Tim Holtz's Compendium of Curiosities Volume II.  This week we've been trying the Shattered Stains technique (as shown on the heart diecuts) and if you want to know how it's done, you should get the book.  Definitely.

Oh, and I just got an email to tell me that my Creative Chemistry Graduate apron is on its way... but will I ever dare to wear it?  

Wednesday 16 May 2012

WOYWW - 16 May


(Head over to Julia's blog at The Stamping Ground to find out about What's On Your Workdesk Wednesday and go blog-hopping for OOOOdles of good stuff and inspiration.)   Today was a long day at work so I've had less time than usual, so it's a work in progress this week.

I've been playing with some of the techniques from Tim Holtz's Compendium of Curiosities Vol. II, and will be putting the tag together once it's all dry.   Notice my teeny-tiny craft knife? I have tried almost every kind of knife on the market and I come back to this kind, every time. I suppose it's what you're used to, but I can't craft without it!


Usually I have to rush out the door as Wednesday night is dance class, however, the Love of My Life has flu (with a touch of plague) and is very sorry for himself and I'll be staying in.   I shall probably be doing my world-famous impersonation of Florence Nightingale, though, not doing any serious crafting. 


Saturday 12 May 2012

If the shoe fits…

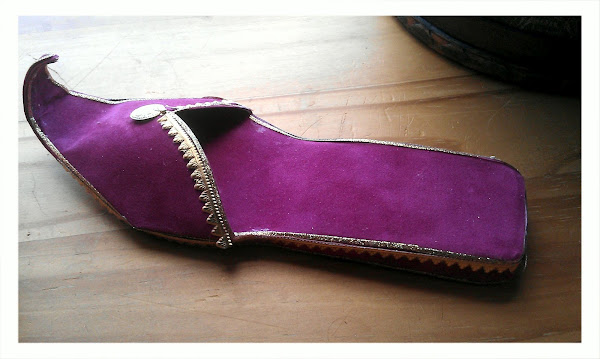
Well, more of a slipper really.

This is based on a “Toe Tapper” template by Coppernob and inspired by an article in a magazine which I saw a few years ago.  I no longer have the magazine (it was probably an issue of Craft Stamper) so I can’t credit the original designer, I’m sorry to say.

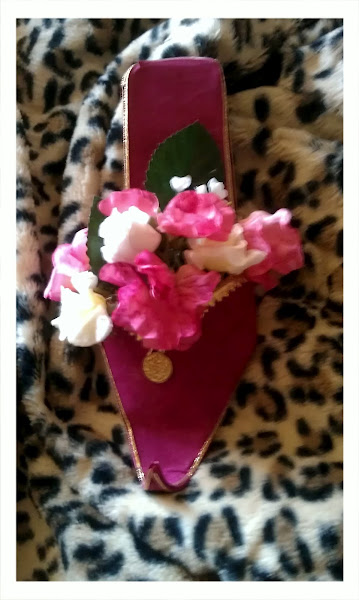
I cut the sole twice, then cut the heel part of the sole out of foam core board twice;  I sandwiched these bits between the sole to build it up a bit: then I cut some strips of tissue paper and glued them round the edge to cover over the gaps.  I had some Artists’ Spackle handy so I used that to smooth over the edges.  I cut  the upper, extended a bit to make the curl. another sole (likewise extended) out of paper and covered it with velvet paper  (me LIIIKE"!)  Some glitter peel-of lines and some German scrap and the job’s a good ‘un.

Filled it with artificial flowers and put a loop for hanging on the back.  It will probably go onto the from of a greeting card for the Mum-in-Law’s birthday.

Friday 11 May 2012

The Iron Fish

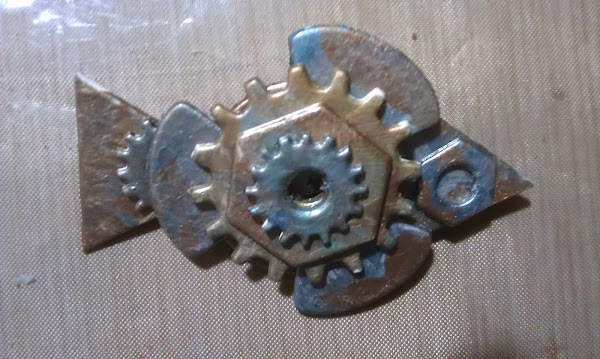
Another project that grew of its own accord. Some time ago, I bought couple of taster packages of Eco-green board shapes after seeing Julia Andrus demo with them on C  &C and painted them up, then started to play with them.

When I was a child there used to be a comic strip in the "Beano" about the Iron Fish, which was a one-person submarine, and I think that, along with the baddies' submarine in the puppet show "Stingray", made me think of arranging the shapes into this fishy pattern. I glued a brooch pin to the back.

I varnished this one, but that was before I discovered Klear floor polish and if I were to do this project again that's what I'd use.

Thursday 10 May 2012

Compendium Of Curiosities Challenge 4

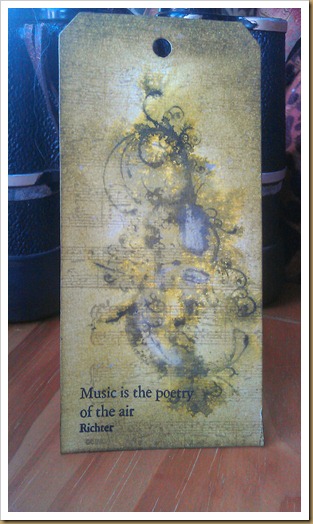
I decided to try out a Tim Holtz technique and take part in Linda Ledbetter’s Compendium of Curiosities challenge.  I am not usually the world’s best with a mask and at first I wasn’t happy with this but…it’s grown on me.  I used some of the new Spring Distress colours – the Lilac and the Lemonade – with my old favourite, Broken China.  Love the subtle effect!

Making good use of the things that we find…

Sometimes I start a project with a clear idea in my head of what I want to achieve and sometimes I just play. This is the result of "just playing". I got the Stamps Away door hangers as a "free gift" when C & C were doing a "buy this, get that free" promotion recently, and I covered them with some paper that I had left over after making up the Following the Paper Trail trunk ("Lady Ermintrude's Portmanteau"). And there I stuck for a while. I went off and played with my Ferro paints - die-cut some gears (Tim Holtz Alterations again - Gadget Gears) and gave them a good coating of Ferro and put everything back in my box of bits. 

Just the other day I found everything (while looking for something else - isn't that just typical?). So here's the result. I like to think that this might be a security device that Lady E might take with her when adventuring, a sort of Steampunk super-padlock, so I'll probably fit the "keyhole" (You can see it at the lower left of the picture -Tim Holtz Alterations again) to it.

Wednesday 9 May 2012

WOYWW - 9 May

Back on the main crafty desk this week for WOYWW!  (See Julia's blog for information about What's on Your Workdesk Wednesdays)

I bought a set of three nesting boxes some time ago and they sat in my stash waiting to be transformed. I love little boxes. I've always loved little boxes that look as if they have a wonderful treasure inside - an enchanted jewel, or a magic potion, or fairy dust - and there are boxes everywhere you look in my house (usually hidden under the craft stash, but let's not go there).

This is the middle-sized box of the three. The big one was Croco'd and is now being used as a jewellery box, the small one was painted pale turquoise and claimed by my husband as being just the right size to hold his wireless mouse and earphones for his laptop. (The cat likes to push the mouse off the desk and we had an incident where he left the earphones on the laptop keyboard with the lid almost shut - the cat jumped onto the laptop and closed the lid. It did the screen no good at all, and if he hadn't forgotten to cancel the "whatever happens" insurance it would have been expensive!) Husband isn't a big fan of heavily-embellished stuff so he let me stamp the lid once with Opalite and to stamp and emboss ONE Clarity corner. ("Let me do all four! Please!" "No!")

Anyway, this one I've painted with Viva Precious Metal paint in Rose. I've covered the lid with some silver fishnet mesh which I stiffened by painting it with a PVA/water mix (enough water to make the PVA runny - about like single cream). I left the first piece to dry on the non-stick craft mat and found that, when it dried, the PVA formed a transparent film in the spaces in the mesh - interesting, but not what I'd wanted, so the next piece I moved to a second sheet after I'd painted on the PVA so it was stiffened without filling in the spaces in the mesh. (Fear not, gentle blogger, I have plans for the first piece....and what if I PVA some tulle...hmmmm!)

Back to the box - blodged on some Ferro in silver and blackberry and gave it some texture with the free stamp from this month's Craft Stamper (by Jennie from The Artistic Stamper, one of my favourite places to shop) and added a bit more mesh.

Remember the first bit of mesh? I cut the butterfly's wings out of it (Tim Holtz Alterations die, Fanciful Flight) and backed them with a bit of fabric painted with Precious Metals in Blackberry . A bit of hardware and the job's a good 'un!

Monday 7 May 2012

Clogged Spritz Bottles…AAARGH!

I do like making my own background papers.  I need solitude though – I take over the whole living room and can’t be dodging around the Love of My Life while he tries to watch TV or use his computer while I’m spraying and splodging and laying bits of copy paper out to dry.  Worst of all is if he comes back early from Bowls and brings his mother in with him, and me covered in ink and not a square inch of floor space to stand on…
So anyway,  the last time I had the opportunity of a good session, I’d hauled out all my Starburst stains and Mica mists and chalk sprays and was ready to go when…THE CLOGGED SPRITZER MONSTER struck! 
Learn from my mistake.  Store spray bottles on their sides if they contain anything that separates out into a sediment.  The sediment gets into the little tube inside and once it gets into the spray head, you’ve got trouble.  OK, I could get new bottles from Ebay (and I did) but I would rather spend my cash on crafting goodies. 
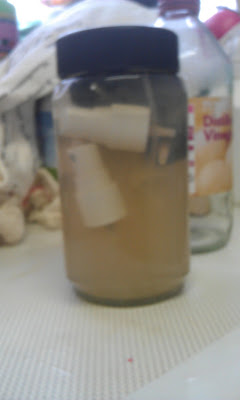
So before I took the step of putting the new spray caps onto my bottles, I did some research into how to unclog the spray nozzles – and it seems that the thing to try is soaking the caps in white vinegar.  So I tried  it.
After 4 hours, I can report some success.  The advice is to leave them overnight, but so far all the little tubes have unclogged and four spray heads.  The Cosmic Shimmer chalks are taking longest – the Special Touch micas have come up nicely as have the Moonshadow mists.  I’ll keep you informed but so far it’s looking good!

Sunday 6 May 2012

Bank Holiday Weekend Blog Catch-up

Had a really fun week, folks.  It began with my third ever migraine.  I had my first about 18 months ago (and was scared silly – it started with a disturbance in my vision and I thought I was having a stroke!).  Migraine is not just a headache – in fact, the headache only lasted a couple of hours and was manageable – it’s the feeling zonked for days afterwards that gets me.  Migraine began on Saturday, it was Thursday before I felt alive again.  Luckily, I was able to take some leave from work, but it’s slowed me down a bit.
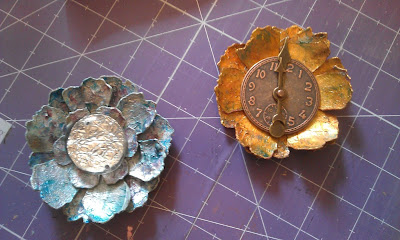
Anyway, I did manage to finish my Ferro/Croco fabric flowers. 
The gold one will be used as an embellishment on the Following the Paper Trail Curio Cabinet that I’m making at the moment.  I am such a fan of Laura Denison!  At present I’m collecting supplies (payday was Monday!) and cutting out the board to make the cabinet.  Not sure where the blue one will go.
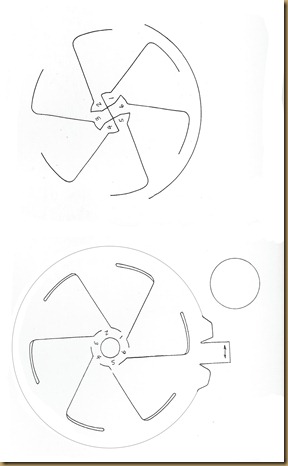
I finished the Circle Dissolve card template and will be posting a how-to slideshow on YouTube as soon as I can get it organised. 
Circle dissolve1
This one is best done in a firm card.  The weak point is the tab so you might want to reinforce it a bit.  It is quite fiddly so it’s worth having a few trial runs before you attempt it on a project.  If you'd like the Silhouette Studio file it can be downloaded from the cutting files page.
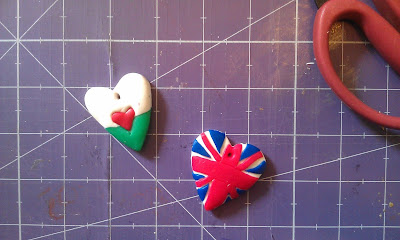
I had the idea for these Polymer clay pendants after I saw some similar ones made out of Friendly Plastic.  I had to do the Welsh flag (of course) but had a go at the Union Flag as well.  They were fresh from the oven here;  I’ve since given them a bit of a polish and a coating of Klear floor polish;  the Klear gives them a lovely shine.
Just have to add the bails and chain now and I’m ready for the Jubilee!

Wednesday 2 May 2012

WOYWW

Rather nervously, I'm taking part in Julia's What's On Your Workdesk Wednesday for the very first time. 
At the moment, I'm working on the workdesk annexe as the actual workdesk is buried under Things That Need To be Tidied Up and these Ferro/Croco'd flowers need space to dry.

I should have them finished in a day or so - more about them then!

Tuesday 1 May 2012

Polymer Clay "Ivory" Plaque

I'm home from work today with a migraine hangover.  I had my first migraine about two years ago - and thought I was having a brain haemorrhage when my vison went wonky! - and this is my third episode to date.  The headache lasted two hours, the aftermath has gone on for two days so far.

I'm feeling slightly more human so I am moved to blog.  This is a polymer clay "ivory" tablet I made a while ago with the technique shown here and then stamped with an "Ancient Egyptian" scene. 
After cooking I did the antiquing thing with brown acrylic paint,  brushed on and then immediately rubbed off.  I got a really lovely soft sheen to the finished piece by polishing it with wet-and-dry sandpaper (using, in turn, very fine, incredibly fine, and outrageously fine) and then covering it with - wait for it - Klear floor polish!  (Now known as Pledge Multi-surface wax if you're looking for it).   As it doesn't get used on the floor in our house, a bottle used as a handy glaze lasts a long time.